Educator, Thinker, Consultant

Category: Moodle (Page 1 of 8)

Moodle Login Page Updates

Moodle

In my quest to make Moodle as easy to use and as efficient as possible, I’ve made two changes to the Login Page.

Reorder Login Fields

The first thing that I did was to reorder the Login fields. Generally, we want users to use the Login with Google button. Thus, I want this the topmost option.

I’ve already written this up, so suffice it to say that putting the best option first is important.

Button Color

Changed the button color of the Google Login button. Added the following code to the RAW SCSS intial field:

a.btn.login-identityprovider-btn.btn-block {
background-color:#ffff00;
}

Note that the color (#ffff00) is a bright yellow.

Summary

I’ve added the following code to the CSS portion of our Moodle theme:

.loginform {
display: flex;
flex-direction: column;
}

login.login-form

{
order: 2;
}
.login-identifyproviders
{
order: 1;
}
a.btn.login-identityprovider-btn.btn-block {
background-color:#ffff00;
}

This accomplishs my goals of highlighting the action that I want my participants to take.

Moodle Login

More and more schools are transitioning to using Oauth for logins. Moodle allows for Oauth logins. However, by default, the Moodle Login box appears first, above the button to login using a service.

This causes lots of people to enter their credentials into the box. In our case, they are entering the “wrong” credentials (i.e. they enter their Google username and password instead of their district account username and password). This leads to frustration on the end user’s part. Signing in is a really bad place to frustrate users.

Knowing that Moodle is customizable, I know there has to be a way to fix this. A little bit of research leads to a couple of different options:

  • customize the CSS
  • use a Plugin

I start with the plugin (Login Splash Page). However, upon installing it, I realize that I need to redirect the login page. I decided that I’d rather not do that.

I found a couple of posts with ideas to customize the CSS. The best of which was a post by Steven A. Although the post says that you have to account for each section, my attempts didn’t support that.

I opened our Login page and right-clicked on it to select “Inspect”. This allowed me to verify the different elements present. (Plus, you can drag them around to change the order, which is useful and kind of cool). Anyway, I could now be sure what the name of each element was. Since the post indicated that you needed to account for all of the elements, I did so. However, the elements still didn’t appear in the order that I wanted. So, back to BBedit (where I had entered the appropriate code). I deleted everything but the two elements and Ta-Da!

In the end, I put the following code:

.loginform {
display: flex;
flex-direction: column;
}

login.login-form

{
order: 2;
}
.login-identifyproviders
{
order: 1;
}

into the SCSS Raw box in the theme that we. That is, in Moodle, I went to :

  • Site Administration | Themes | LearnR | Look
    then clicked on the SCSS tab. I entered the code above into the “Raw initial SCSS” box, scrolled down, and clicked “Save”. (*Note that this needs to be done for each Theme that you use if you use more than one. Or, if you change themes in the future, this must also be updated in that theme.) Now, end users will see the Login with Google Button first.

Whew!

Given the prevalence of utilizing Oauth, I hope that someone at Moodle will make this a checkbox preference in the future. However, at least for now, this is set for me.

Moodle

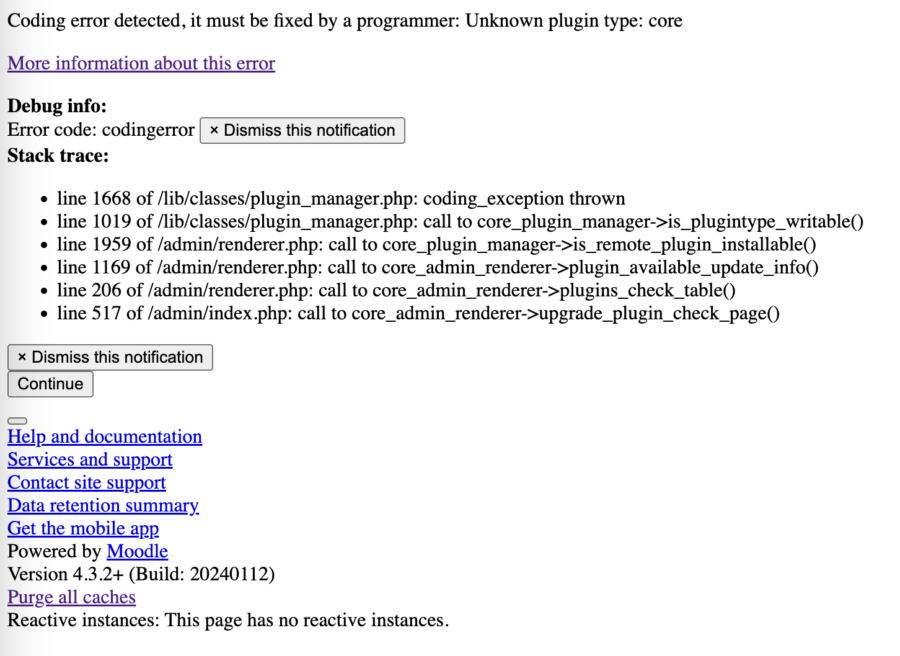
On Friday, I upgraded Moodle as the newest version fixes an issue with the Lesson Module. Great. Except, the site crashed during the upgrade cycle.

Great! Time to do some research. I headed over the Moodle Forums to see if this was a known issue. Yep. Yep, it is. That led to a Bug Report. Here I got enough information to get some things running again. I tried deleting different plugins, and adding them back in. No full fix, but I had access to my site.

Then, I flew too close the sun. I used the “uninstall” link from the Plugins Overview page, and broke everything.

Drats.

I’ve been able to return access to my site. I don’t have everything fixed yet though.

I found an article on enabling “disable auto update” while installing. This involved uncommenting out a specific command in .config.php file. For me this was line 457:

$CFG->disableupdateautodeploy = true;

It is commented out. By uncommenting it (removing the //), it has allowed by site to update.

After doing this, I can uninstall plugins from the Plugins Overview page.

By deleting the // at the beginning of the line (those symbols comment out the line, which means that the program won’t run that command), the command is active and, tada!, I can complete the upgrade process.

So, a partial fix. I can now uninstall plugins, but I can’t install them. I’m going through to uninstall plugins that could be the problem, but I’m not completely convinced that this is going to solve the problem. At least the site is back up and available.

MoodleNet Thoughts

I posted on Mastodon about the lack of feedback on Moodle Net. Martin replied asking for feedback. I’ve responded, but I thought that I would flesh out my thoughts a bit here.

I love Moodle and what you can do with it. I love that there isn’t a big money-making, data-sucking, privacy-invasive company running it.

A little background. I’m in the US. Specifically, I’m in K-12 education teaching and learning. Moodle is not super popular. There are certainly a few places, but Moodle is much bigger at the University level than K-12. There is much angst over Moodle. Quite simply, teachers find it “too hard”.

There are reasons that Google Classroom has taken over. It really doesn’t do much (thus, much less to learn for teachers). Google Classroom is essentially handing out worksheets and getting them back (another bonus, teachers understand the worksheet process).

When COVID hit, there was a rush for two things, video conferencing and an LMS. Zoom quickly captured the video conferencing mindshare. So much so, that even now it is pretty much the only game in town. Google Classroom captured the LMS market (note that it not an LMS but that doesn’t matter). It doesn’t even matter that it is not an LMS. The District that I was in at the time evaluated Canvas, Schoology, and Moodle (we had Moodle installed and were known internationally for our work in Moodle – due to Chris Kenniburg). The District chose to go with Schoology. It was “easier”.

MoodleNet

So this is one reason I was (still am) hopeful for MoodleNet. MoodleNet should be a great way to share resources, activities, etc. This means teachers wouldn’t have to create all their own material. This alone would make Moodle “easier”. Teachers could get started.

However, I do not find MoodleNet engaging. I’ve posted some things there, but I don’t get any feedback. There is currently no way to provide feedback. I can’t tell someone that I liked their materials or that I used it with changes. Hence. I reached out to Martin.

I don’t think that this needs to be overly complicated. I thought about ratings, 1-5 stars, adding how it was used, tags, and more. Really though, I think a simple comment box would be the way to go. Let users decide how to use it. Let users make comments. Provide a link back to the profile of the user, what date the comment was made, but otherwise, just free-form comments.

I am hopeful that that would provide a bit of social connections. It would provide the opportunity to provide feedback. It may encourage more people to submit resources.

Lock Down Exams

Recently I was asked to create a Lock Down environment for students writing essays. This is definitely a direct response to ChatGPT and similar tools.

I’ve set up Moodle with Safe Exam Browser. This is well supported by Moodle. However, I had to make sure to add a “Quit Password” to the assignment. It is also easiest to let Moodle take care of the configuration. It is absolutely crucial to set a “Quit Password”.

Next, the teacher wants two things:

  • A Word Count for students
  • Indented paragraphs

The good news is that there is a plugin for the Atto Editor called Word Count. Not surprisingly, that provides a Word Count feature directly within the Atto editor. Once you add that plug-in (AND add “count = count” to the Toolbar config within the Atto Editor settings – this makes the button visible), students have access to see how many words they have written with the click of a button. This is AWESOME!

I’m still trying to solve the indenting a paragraph issue. Since hitting the tab key moves to the next component for websites, that is a no-starter. However, I’m reviewing some plugins that may help. I’ve tried Components for Learning (c4l), but that doesn’t have what I need. It is a great plugin, just doesn’t solve this issue.

Currently, I’m taking a look at the Atto Editor to see if there is anything there that I can do.

*Padlock image by Roy Harryman: www.RoyHarryman.com

Using ChatGPT to Create Multiple Choice Questions to Put into Moodle

This is a tutorial on having ChatGPT write questions to be imported into Moodle using the GIFT format. I’m going to use BBEdit as my text editor, but you can use a different one. The free version of BBEdit should do everything in these steps (* NOTE: Google Docs won’t work for the Regular Expression Find and Replace (Step 3). Microsoft Word will.)

Step 1:


Have ChatGPT write your multiple choice questions and format them in a specific way. The key is to include this sentence at the end of your request:

…Use the following format:
{1. MCVS:=Right answer/Wrong answer/Wrong answer/Wrong answer}

So, in my example, the search criteria was:

Write 50 Multiple-Choice Question about Maine. Use the following format:
{1. MCVS:=Right answer/Wrong answer/Wrong answer/Wrong answer}

This resulted in the following:

Sure, here are 50 multiple-choice questions about the state of Maine:

What is the capital city of Maine?
{MCVS:=Augusta/Portland/Bangor/Lewiston}
Which river flows through the city of Augusta?
{MCVS:=Kennebec River/Androscoggin River/Penobscot River/Saint John River}

So far so good. However, you need to do some formatting.

  • GIFT needs a blank line between questions.
  • Wrong answers need to be marked by an “~” (right answers need an “=”, but we’ve got that already).
  • “MCVS:” needs to be removed

Step 2: Copy/Paste the questions.

Highlight the questions in ChatGPT and copy them.

Paste the questions into your text editor (preferable over a word processor).

BBEdit:

Since I’m using BBEdit, you can use File | New> (with Clipboard).

Pages, Word, Google Docs

Paste the questions into a blank document.

Step 3: Add a blank line between questions:

No matter how you do this, it is just important that there is a blank line between each question. This is how questions are delineated. You should visually inspect the text to make sure that there is blank line.

BBEdit:

  • Click on Search | Find…
  • in the Find box, type: }
  • In the Replace box, type: }\r
  • Click the Replace All button.

This will find and replace all of those instances quickly.

Google Docs

This must be done manually in Google Docs. There is not currently an easy way to script this. You’ll need to set the cursor at the end of each answer line and press the return/enter key.

Manually place your cursor and hit return/enter after each “}” at the end of each answer line. This can take a while based on the number of questions.

Step 4: Remove the MCVS:

  • Click back into the Find window
  • In the Find box enter: MCVS:
  • In the Replace box – delete all text so that there is nothing in it
  • Click Replace All

Step 5: Add an “~” in front of the incorrect answers:

BBEdit:

  • Click back into the Find window
  • In the Find box enter: /
  • In the Replace box, you need two characters: (type a space)~
  • Click Replace All

Google Docs:

  • Click on Edit in the Menu bar
  • Choose Find and Replace
  • In the Find window, enter: /
  • In the Replace box, you need two characters: (type a space)~
  • Click Replace All

Optional
Add a category for the quiz questions. This means that in Moodle, these questions will all be identified in a specific category.

  • Scroll to the very top of the document.
  • Set the cursor and create a new blank line.
  • Type “$CATEGORY:XXXX” (Replace XXXX with the category name that you want).*Bonus, you can also create subcategories by adding a “/Subcategory” after your category. Thus, If you wanted a category of World War I, it would look like this:

$CATEGORY: World War I

If you wanted a sub-category of “allies” in World War I, it would look like this:

$CATEGORY: World War I/allies

  • Create a blank line below the category line.
  • Save the file

Moodle

Open your Moodle instance. Go to the course that you want to put the questions in.

  • Click on the More link in the top sub-menu
  • Select “Question Bank”
  • Click on the Questions button and select “Import”
  • Select “GIFT format” radio button
  • Drag and drop the file (or use the “Choose a file button”) to add the file that you previously saved.
  • Click “Import” button at the bottom
  • Read through the questions, scroll down and click “Continue”

That’s it. You’ve now created a bunch of questions and imported them into Moodle, ready to go.

Check the Questions

Please remember the ChatGPT is NOT programmed to be right. It will be confident, but maybe not right. It is crucial to check all the questions for accuracy.

In Moodle, you can utilize the Preview function. You may want to review the questions prior to import. Either will work, it depends on your preference. Do make sure to review the questions though.

AI -> Moodle Questions

A friend used ChatGPT (I know, I know) to create a wide variety of questions for a Geography Bee for school. The questions are all Michigan based questions. ChatGPT created a wide variety of questions. However, these need to go into Moodle.

Moodle has a great quiz question import format (GIFT format). This allows one to write questions in a text editor and import into Moodle. The format is pretty easy, but does require a bit of learning.

Attempts to have ChatGPT export the file as GIFT format were unsuccessful. So, the teachers are doing a good bit of copying/pasting. While this is still WAY faster than writing and typing, I thought that there had to be a better way.

I made a copy of the file that was downloaded from ChatGPT. Then I took the following steps:

Open Ended Questions:

  • I used Find/Replace function by Finding ” Answer:” and replacing that with “{}”.

Example:
What is the capital of Michigan? Answer: Lansing
Becomes:
What is the capital of Michigan? {Lansing}

I then also added a “}” at the end of each line (manually, need to figure out how to automate that). Plus, I made sure that there was a blank line between each question.

Multiple Choice Questions:

  • I used Find/Replace to Find: “ A)” and Replace that with “{~“ . This creates the opening bracket for answers (and also marks the first answer as “incorrect” but that will be fixed next.
  • Next, I added“=” in front of the correct answer AND “~” in front of incorrect answers. This was done manually
  • I deleted the answer line by triple-clicking it and hitting “Return/Enter”.*This creates the necessary blank line between questions.
  • Then I used Find/Replace to change the letters to ~ (e.g. “B -> “~”, then “C” ->”~, “D” ->”~). This works as we’ve already removed the A and we’ve replaced letters if the answer is correct.

Example:
What is the capital of Michigan? A) Detroit B) Grand Rapids C) Lansing D) Ann Arbor
Answer: C) Lansing
Becomes:
What is the capital of Michigan? {~Detroit ~ Grand Rapids =Lansing ~ Ann Arbor}

Categories:

Next, I added Categories by adding “$CATEGORY: Geography Bee” to create a Category of “Geography Bee” Make sure there is a blank line after this line.
In another section, I added “$CATEGORY:Geography Bee/Counties” to create a sub-category of Counties under Geography Bee.

Export:

I then exported (downloaded) the document as a text file (.txt).

Moodle

Next, I went to the Moodle Course where I wanted the quiz.

  • I clicked on More…| Question Bank.
  • I clicked on The Questions button to select “Import”
  • I picked “GIFT format”
  • I dragged the file into the “Import questions from a file” box.
  • I clicked the “Import” button

This creates all of the questions in Moodle under the appropriate categories. Now you could edit, assign, move any and all of the questions as you like.

That’s it. I know that it may sound like a lot, but once you understand what is happening, this is really pretty quick.

Special Note:

If there is anything that you don’t want to be included in the import, simply add “//” at the beginning of that line. I used this to explain what was happening to the others involved. This is called commenting something out.

Students Prioritize Using Moodle

I posted about having students prioritize choices (Ranking The Bill of Rights). I’ve now created a Comic with instructions on how to do this. Although I’ve used the Bill of Rights, this could easily be done with a wide variety of topics.

For example, you could have students prioritize study skills, Presidents, financial goals, geologic characteristics, and more. This is limited only by your content.

Students Prioritizing is also posted on my MoodleNet account.

Ranking the Bill of Rights

The teacher wanted the students to rank the Bill of Rights. This can be a great discussion exercise. The students decide which of the first ten amendments to the Constitution are “most important”.

The teacher had used a site in the past. However, since it had been used in the past, the stated that voting had already occurred.

Moodle to the rescue. Well, Moodle and Questionnaire.

Moodle -> Questionnaire and 3 minutes of copy/paste, the teacher now has the activity completely under control. No external website needed.

Plus, Questionnaire has awesome reporting. The teacher can decide if the kids do it once or more often.

So our use case is that the teacher is talking about the Bill of Rights in general. Then the teacher will then have the kids rank the Bill of Rights in terms of importance. Once all of the students have ranked them, the class will discuss their rankings and why. Then the students will rank the Bill of Rights again.

This activity uses Moodle and the Questionnaire Module.

Here are the settings that I used:

These Settings are for the Questionnaire as a whole. Thus, these will be set up when you create the Questionnaire. You must give the questionnaire a Name. The Name is what the students will see. You can provide directions in the

Response Options:

Type: I set this to “respond many”. This could easily be set to “respond once”.

Respondent Type: “full name”. This could be set to “anonymous”, but I’d want to see if student answers change.

Students can view ALL responses: Never. If you’ve set the Respondent Type to anonymous, you could let the students see the results. However, I would share the results via the projector.

Save/Resume answers: I almost always set this to “yes”. This is a quick poll, so it doesn’t have to be “yes”.

Activity Completion

The default on Activity Completion is “Student can manually mark the activity as completed”, but I almost always (and out of habit), change this to “Show activity as complete when conditions are met” (and then tick the box for “Students must submit this questionnaire to complete it”

I generally avoid adding dates on activities as that can come back and be an issue in the future. Naturally, you could set the Availability for Allow responses from and Allow responses until if you wish.

I added a question of the type [Rate (scale 1..5)]

Question Settings

I clicked the tick box to make “Response required”

I also changed the scale (Nb of scale items) to 10 since there are 10 Amendments in the Bill of Rights.

I chose “No duplicate choices” as the teacher wants the Amendments ranked.

Question Text is where you enter the question/directions. We entered

“Rank the Amendments. 10 is the MOST important, 1 is the LEAST important. Please note that each column can have only ONE choice. Thus, if you rank Amendment I as the Most Important clicking on Most Important for another Amendment would remove the ranking from Amendment I. “

Next, I copied and pasted each Amendment in the Possible Answers box (make sure that each Amendment is one line – i.e. there are no “hard returns”).

Then I added the Named Degrees:

1=LEAST important
2=2
3=3
4=4
5= Mid-point of importance
6=6
7=7
8=8
9=9
10= MOST important

Save the question. Then use the Preview link to view your awesomeness.

Since this is a questionnaire, we do have lots of options that we could add. For example, we could have students explain why they ranked the Amendments where they did. However, this will be done as a class as a whole group discussion.

« Older posts

© 2025 Troy Patterson

Theme by Anders NorenUp ↑